How do I setup SLAs?
Last updated: July 17, 2026
Use Triggers to setup SLAs including:
First Response Time
Response Time (subsequent after first response)
Resolution Time
SLAs will only tick during your defined support hours when the “use business hours” (or “count only support hours”) option is enabled on the trigger. When enabled, the system multiplies the target by 24 hours and then counts only business hours. For example, a 5‑day target with 8‑hour/day Monday‑Friday support hours calculates as 5×24=120 business hours, which equals approximately 3 calendar weeks.
When “count only support hours” is disabled, the target uses calendar time. A 5‑day target means 5×24 calendar hours from when the SLA starts.
Set SLAs
The simplest way to setup an SLA is to Create a Trigger with Kickoff New Issue Created that takes the Set Issue SLA Action.
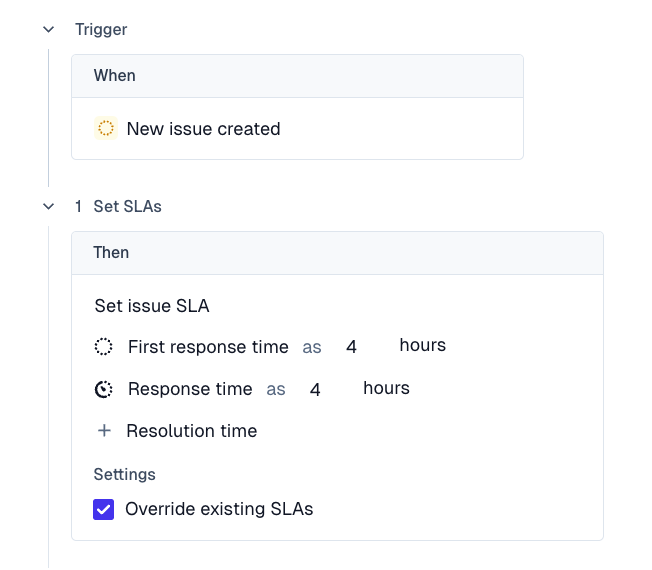
Choose time calculation mode:
For business days (work hours only): Set the target to the number of work hours desired (e.g., for 5 business days with 8‑hour workdays, set 40 hours) and enable “use business hours”.
For calendar days: Set the target to the desired number of days (e.g., “5 days”) and disable “count only support hours” to count calendar hours.
Important: When you modify an SLA trigger's configuration, the changes only affect SLAs going forward. Tickets that already have a breach time set will keep their existing SLA deadline until something re‑triggers the SLA calculation on them.
Trigger precedence: When you have multiple active SLA‑setting triggers, they run top‑to‑bottom and the first match wins. If you have overlapping triggers, you need to update whichever one is firing on the tickets, or update both to be safe.
More Complex Examples
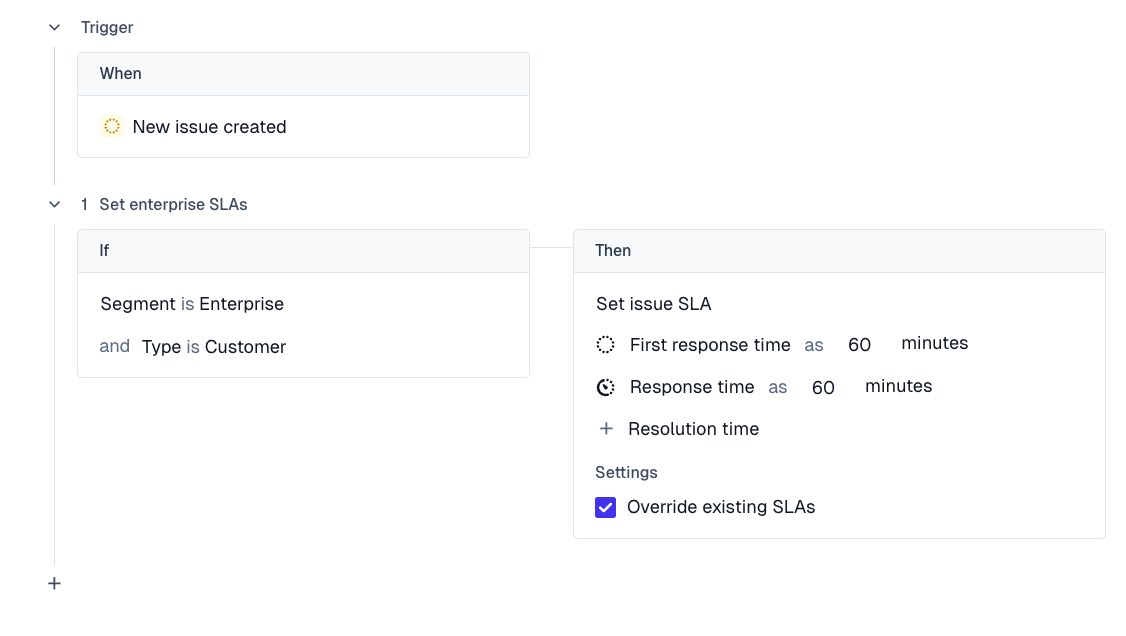
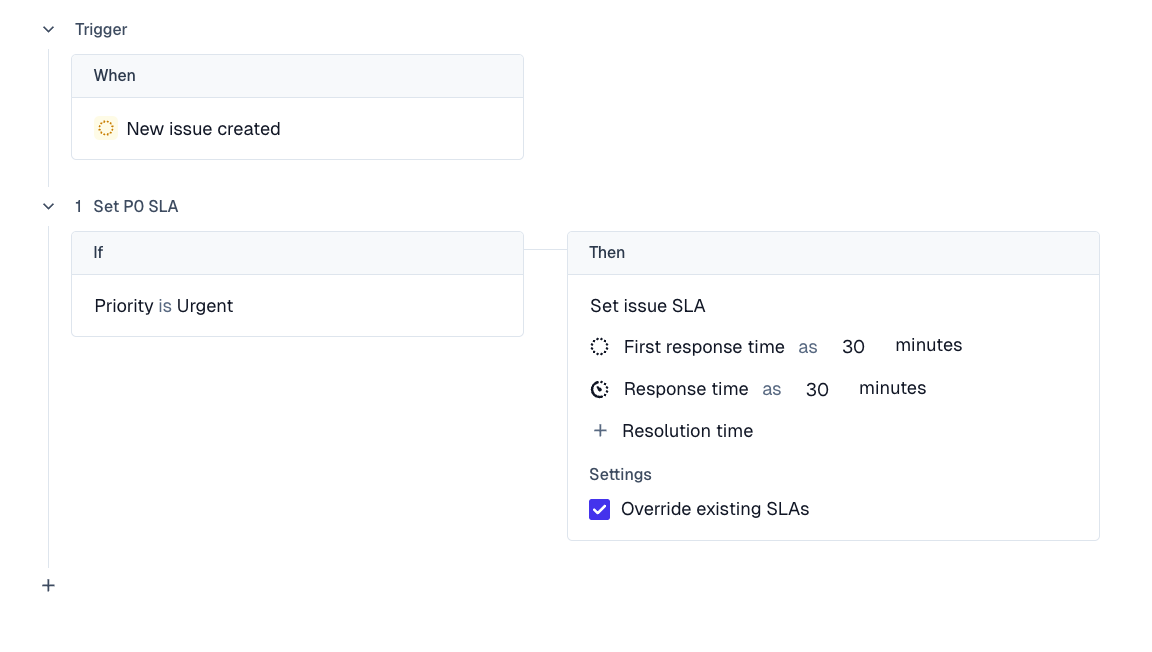
You can use filters (in the IF... section) to set more granular SLAs for specific customer or issue segments.
For example, set more granular SLAs if:
Customers are marked as Enterprise (can be pulled from your CRM) or you can mark customer tier using Account Fields.
Issue Priority is set as Urgent vs Low.
Bulk-Update SLAs on Existing Tickets
Create a new trigger:
Kickoff: “Issue tags changed”
Condition: tag equals a temporary tag (e.g.,
sla-fix)Action: “Set Issue SLA” → configure your first response (and resolution if needed) to the corrected target with appropriate business hours settings
Go to the issues list, multi‑select the affected tickets, and bulk‑apply the temporary tag from the action bar
Each tagged issue's SLA will recompute against the new target
Once complete, remove the tag (or leave it as a marker) and disable/delete the temporary trigger
Setup SLA Breach Notification
You can be alerted when an SLA gets breached.
Just use the Issue SLA Breached Kickoff and set the Action to Send Slack Notification.
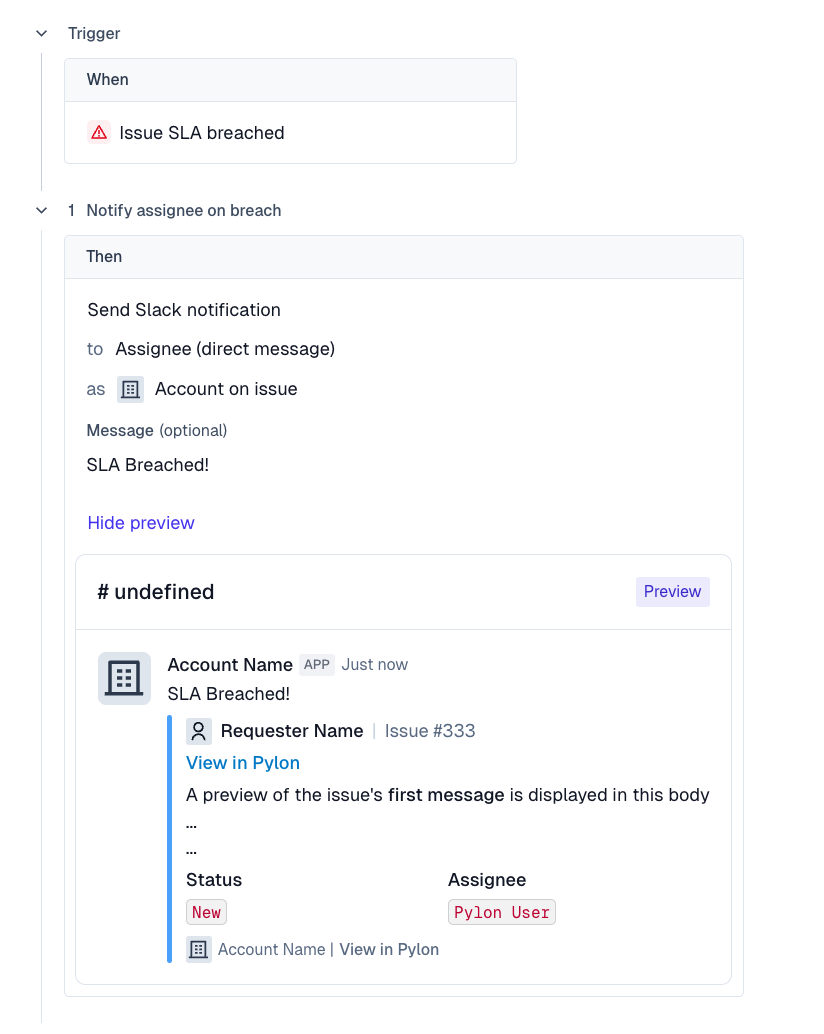
Note: The “Issue SLA Change” trigger fires AFTER an SLA changes and is meant for reactive actions like posting Slack alerts. It cannot be used to set the SLA itself, as that would cause it to trigger itself.
Set up SLA warning notifications before a breach
You can also send a warning notification before an SLA breaches by using a front delay trigger. Front delay triggers let you schedule an action relative to the SLA deadline, such as notifying a Slack channel 30 minutes or 1 hour before the SLA would breach.
Use this when your team wants time to intervene before the SLA is missed, instead of only being notified after the breach happens.
Fastest path — use the template: Go to Settings > Triggers > Create New Trigger and start from the "Send Slack notification on SLA breaches" template, then adjust the front delay as described below.
To build it from scratch:
Go to Settings > Triggers and click Create Trigger.
For the kickoff event, select Issue SLA breached.
Click + Front delay and set how far before the breach the trigger should fire (e.g., 30 minutes or 1 hour).
(Optional) Add a filter to confirm the issue is still open / unresolved, so resolved issues don't fire a warning.
Add your action — e.g.,
Send Slack Notification— and include the issue/SLA context your team needs to triage quickly (assignee, priority, link to the issue).
Tip: Use an SLA breach notification for after-the-fact alerts, and a front delay trigger when you want a proactive warning before the deadline.